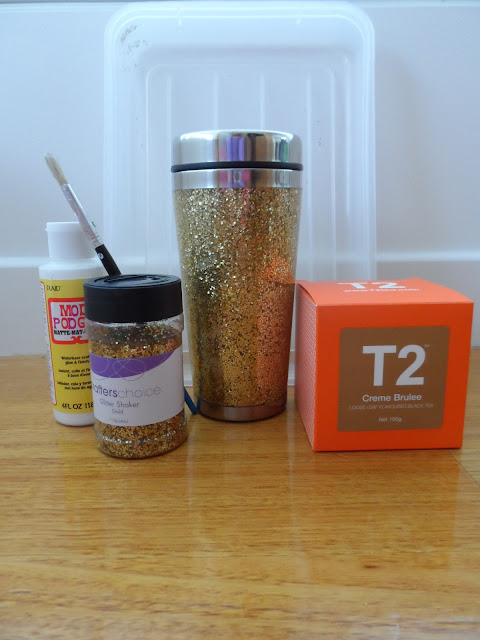
it suddenly occured to me, i haven't yet blogged a 'diy' yet, so for my first diy i thought i'd just do something nice and easy that's just five simple steps.
now i did do this diy before i started blogging, therefore i don't have any 'during' shots but a while ago my mum bought me a cute take-away coffee cup with a paper paris themed picture on the inside. after using it for a while my dad put it through the dishwasher and of course, it leaked through and stained all the paper. i still wanted to use the cup and had seen a few pictures of glitter take-away coffee cups online so decided, now that the picture was ruined, i may as well give my own glitter coffee cup a whirl. although i did see other posts on the net, i pretty much just made my diy up.
you'll need:
- take-away coffee cup (example of what type is below)
- glitter in your choice of colour (larger glitter flakes work better for this project)
- glue (mod podge glue is amazing for this)
- smallish paint brush
- container or bowl to catch excess glitter (& newspaper if you're likely to be a little messy)
note: the kind of coffee cup you'll need will be able to unscrew from the bottom and will have an inside and outside layer. the outside layer should obviously be clear plastic so you can see the glitter.
step one: take apart your coffee cup like above ^. on the clear section paint a layer with your paint brush over half the cup with the glue and quickly sprinkle a generous amount of glitter into the cup. roll the cup from side to side so the glitter spreads across the glue but if you have a hole in the bottom from where the two layers connect, be mindful glitter doesn't fall out the bottom. feel free to lightly pat the glitter down into place too. tip any excess glitter into the spare bowl or container.
step two: repeat the above on the other half of the coffee cup. you can use any excess glitter you may have tipped out before, on the other half of the cup. you'll notice the glue will be very white, but it will dry completely clear so don't worry if the outside looks more white than glittery.
step three: continue applying the glitter, alternating between the two halves until there is a nice layer covering on the inside. make sure the layers aren't too thick however, or the inside part of the cup will not fit back into place. any tiny gaps between the glitter won't matter too much as once it's dry you generally won't notice them and if you do, you can always fix them later.
step four: if you want, once the glue has dried for about half an hour you can gently paint one last layer of glue over the entire inside of the cup, just to seal the glitter in place. you don't have to do this, but i did, just to prevent the glitter from shedding over time.
step five: now you just have to wait for your cup to dry! as i said, it may look very white from the outside because of the glue but the white will become clear once it's dry. if you've missed any spots, you can just go back over them with a little more glue and glitter. screw the two sections back together and you're ready to have your coffee on the go.
and TA-DA! you're very own glittery coffee cup. i'm so glad i did this diy as it looks so effective once you're done. just note that you can't put the whole thing in the dishwasher (although you can't with most of these types of cups anyway). if you want to try and put it in the dishwasher however, you'll be best to unscrew the two parts and put the non-glitter half in there on it's own.
let me know if anyone gives this a whirl and what you think of this diy.
cheers, x
cheers, x


Ah, that's really cool and so creative! :) I love glittery coffee cups- the black and silver ones tend to be so boring.
ReplyDeletethankyou!
Deletebest part is it's so easy but super effective.
thanks for stopping by.
That second to last photo belongs on pinterest-tumblr-everywhere. You've got great photography skills. And I love how in depth you went with this diy post. Inspired me! =)
ReplyDeletethat's so lovely of you. thankyou so much.
Deletei must admit as a glitter lover, that photo does indeed make me smile!
i'm so pleased you enjoyed this.
thanks for checking out my little piece of the internet.